Tile grout is one of the most overlooked parts of home cleaning, yet it has a huge impact on the look and feel of your space. Over time, grout lines—those thin strips between tiles—can become discolored, stained, or grimy due to dirt, spills, and everyday wear. Many homeowners assume that once grout gets dirty, the only solution is to rip it out and replace it—a time-consuming and expensive project. Fortunately, there’s a quick, effective method you can try at home to restore dirty grout without demolition. With the right materials, a little effort, and a few simple steps, you can make your grout look fresh again.
Why Grout Gets Dirty
Before diving into cleaning methods, it’s helpful to understand why grout gets dirty in the first place. Grout is porous, which means it can absorb liquids and trap dirt, mold, and mildew. Common causes of grout discoloration include:
- Spills and stains: Coffee, wine, and sauces can seep into grout in kitchens. In bathrooms, soap scum and body oils build up over time.
- Moisture: Bathrooms and laundry rooms are particularly vulnerable because damp environments promote mold and mildew growth.
- Foot traffic: Entryways, hallways, and floors in high-traffic areas accumulate dirt and grime more quickly.
- Cleaning habits: Using only water or surface cleaners may remove dirt from the tile but leave grout stains untouched.
Because grout is porous, dirt penetrates deeper than the tile surface. That’s why traditional cleaning methods, like wiping with a sponge or mop, often fail to restore it completely.
The Common Mistake: Ripping Out Grout
When grout looks bad, the instinct is sometimes to scrape it out and replace it. While this can work, it’s an invasive and costly process. Grout replacement involves:

- Removing old grout with a chisel or power tool
- Cleaning the space thoroughly
- Applying new grout and letting it cure
- Sealing the new grout to prevent future stains
Not only is this process labor-intensive, but it can also damage surrounding tiles if done incorrectly. Plus, it creates a lot of dust and debris—something most homeowners would prefer to avoid.
The good news is that you can restore your grout’s appearance without ripping it all out. Modern cleaning techniques and products make it possible to remove dirt, mold, and stains efficiently at home.
Quick Tricks for Cleaning Grout
Here’s a step-by-step guide to cleaning dirty grout effectively using materials you may already have. This method avoids harsh chemicals and removes stubborn dirt safely.
1. Gather Your Supplies
You will need:

- Baking soda
- White vinegar
- A spray bottle
- A stiff-bristled brush or old toothbrush
- Warm water
- Microfiber cloths or paper towels
- Optional: hydrogen peroxide (for tough stains)
Baking soda and vinegar are household staples that work together to lift grime, deodorize, and remove mild mold and mildew.
2. Make a Baking Soda Paste
Start by mixing baking soda with a small amount of water to create a thick paste. The consistency should be spreadable but not runny. Baking soda is mildly abrasive, which helps scrub the grout without damaging tiles.
3. Apply the Paste to Grout Lines
Using a small spatula, your fingers, or even a toothbrush, apply the paste directly onto dirty grout lines. Make sure to cover all stained areas. Let the paste sit for about 10–15 minutes to allow it to penetrate the dirt and grime.
4. Spray Vinegar Over the Paste
Fill a spray bottle with white vinegar and spray it over the baking soda paste. You’ll notice fizzing—that’s the chemical reaction breaking down dirt and grime. This reaction is safe for most tiles, including ceramic and porcelain, but avoid using vinegar on natural stone tiles like marble, travertine, or limestone, as the acidity can damage them.

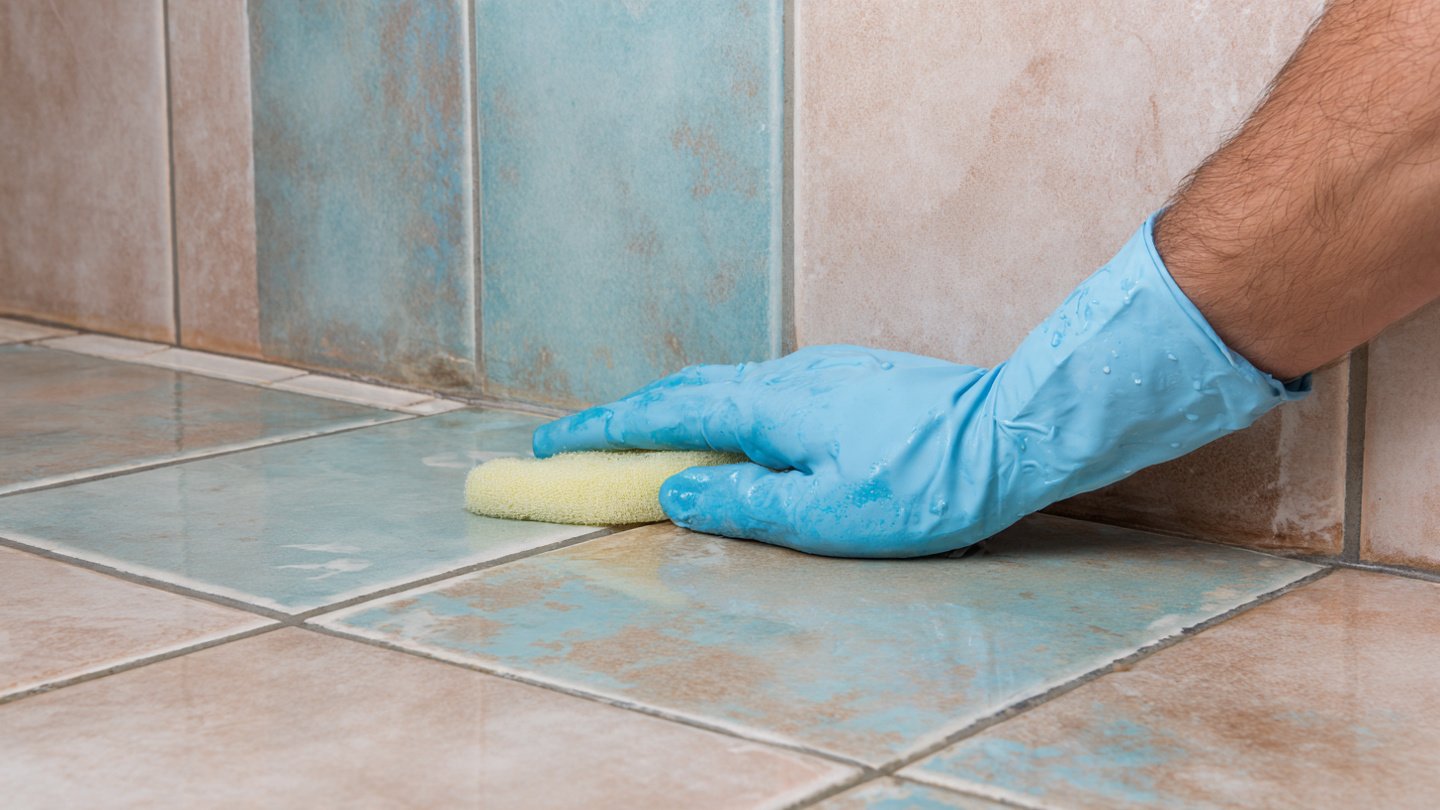
5. Scrub the Grout
Once the fizzing settles, use a stiff-bristled brush or an old toothbrush to scrub the grout. Focus on areas with heavy staining, applying gentle pressure to lift embedded dirt.
6. Rinse and Wipe
After scrubbing, rinse the area with warm water and wipe away excess baking soda and vinegar. A microfiber cloth works best for absorbing moisture and leaving tiles streak-free. Repeat the process for particularly stubborn areas.
For Tough Stains
Some grout stains may require a stronger approach. Here’s what you can try:
- Hydrogen Peroxide: Mix hydrogen peroxide with baking soda to form a paste. Apply to grout lines and let sit for 10–15 minutes before scrubbing. Hydrogen peroxide is effective against mold and mildew and is safe for most tiles.
- Commercial Grout Cleaner: If natural solutions don’t work, there are many grout cleaners available that are specifically formulated to tackle tough stains. Follow the manufacturer’s instructions and test a small area first.
- Steam Cleaning: Steam cleaners can remove dirt and bacteria without chemicals. The high temperature loosens grime and sanitizes the grout.
Prevent Future Grout Problems
Cleaning your grout is just the first step. To keep it looking fresh and reduce the frequency of deep cleaning, consider these preventative measures:

- Seal Your Grout: Grout sealers create a protective layer that resists stains, moisture, and mold. Apply sealer after cleaning and reapply as recommended, usually every 1–2 years.
- Regular Maintenance: Wipe down tiles and grout after showers or spills to prevent buildup. A weekly pass with a gentle cleaner or vinegar-water solution helps maintain brightness.
- Avoid Harsh Chemicals: Bleach and abrasive cleaners may remove surface stains but can damage grout over time. Stick to gentle, pH-balanced cleaning solutions.
- Use a Grout Brush: Keep a dedicated small brush handy for spot cleaning. It’s easier to prevent stains than to remove them once set.
Benefits of Cleaning Without Replacing
By cleaning grout instead of ripping it out, you save time, money, and effort. Here’s why this approach is preferable:
- Cost-effective: No need for new grout, tools, or professional services.
- Eco-friendly: Avoids excess waste and chemical runoff.
- Less mess: No dust, debris, or construction involved.
- Preserves existing tiles: Reduces the risk of chipping or cracking.
- Satisfying results: Restores the original appearance of your floors or walls.
When to Consider Replacement
While cleaning is effective for most cases, there are instances where grout may need replacement:
- Extensive cracking or crumbling
- Persistent mold deep in the grout that cannot be removed
- Significant color fading that cleaning cannot restore
- Grout deterioration affecting tile stability
In such cases, partial or full grout replacement may be necessary, but these scenarios are relatively rare with proper maintenance.
Final Thoughts
Dirty grout doesn’t have to be a permanent eyesore or a reason to undergo expensive renovations. With simple home solutions like baking soda and vinegar, a bit of scrubbing, and preventative care, you can restore your grout to its original brightness without tearing it out. The key is consistency—regular maintenance and occasional deep cleaning keep grout looking fresh year-round.

By following the steps outlined in this guide, you’ll save money, avoid unnecessary stress, and improve the overall look of your tiles. Not only does clean grout enhance the beauty of your floors and walls, but it also contributes to a healthier home by removing mold, mildew, and trapped dirt.
Next time your grout starts to look dingy, remember: the answer isn’t demolition. With this quick trick and a little effort, your tiles can shine as brightly as the day they were installed—no ripping required